

For thousands of years people have tried to make growing plants easier, and that’s still the case today. One of the latest trends to hit the gardening scene is the vertical planter, specifically the pyramid raised garden bed. There are numerous advantages to having one of these beds in your garden. Not only do raised pyramids make it easier to keep out ground insects and pests, but you won’t have to put as much physical stress on your body while tending to your garden and you’ll extend your growing time. Here’s how to build your own awesome pyramid raised garden bed.
Choosing Materials
You can use just about any wood that you’d like for your garden bed, but try to avoid using pressure treated lumber at all costs. Such wood has chemicals that can be harmful to the soil, and if you’re planting vegetables you don’t want to ingest any toxins from the food that you grow. Using reclaimed wood or PAR pine planks works well for this project.
In addition to wood, at minimum you’ll need a mitre or hand saw, electric drill and drill bits, screws, a measuring tape, a pencil to mark your measurements, and enough soil to fill the finished garden bed. Of course, you should also have some seeds or plants on hand as well.
Placement Planning
Unless you’re making a very small pyramid raised garden bed, the finished result will be very heavy, especially once soil is added. This is why you should plan where you want to place it before you being your project. Consider how much sunlight the plants you’re growing need and how much space will be optimal for their growth. If you’re making more than one garden bed advance planning is especially important for the sake of maximizing space and positioning the plants in areas where they can thrive.
One of the primary benefits of building this type of garden bed is you’ll be able to grow a large number of plants in a small amount of square footage, so don’t feel pressured to make a huge pyramid bed if it doesn’t suit your outdoor space.
Assembling the Frame
The frame is what will hold each level of your raised garden bed, and you should consider how tall you want it to be. Once you’ve decided upon the ideal height for your garden, measure and cut four wood planks to the same length. Next take one board, measure out a 30 degree angle at one end, and then cut the board with your saw. Take the same board, measure out a 60 degree angle at the opposite end, then make another cut. Repeat this process on all four boards for your frame.
When you go to assemble the frame of your pyramid garden bed, position each of the four planks of wood so that the 60 degree angle cuts point upwards. It’s easiest to work with two boards at a time — screw two boards together securely, and the frame will be able to stand on its own, allowing you to add on the remaining two boards.
If you feel like the frame is a bit wobbly, that’s normal. Once you add in the horizontal supports, the entire garden bed will be sturdy and very stable.
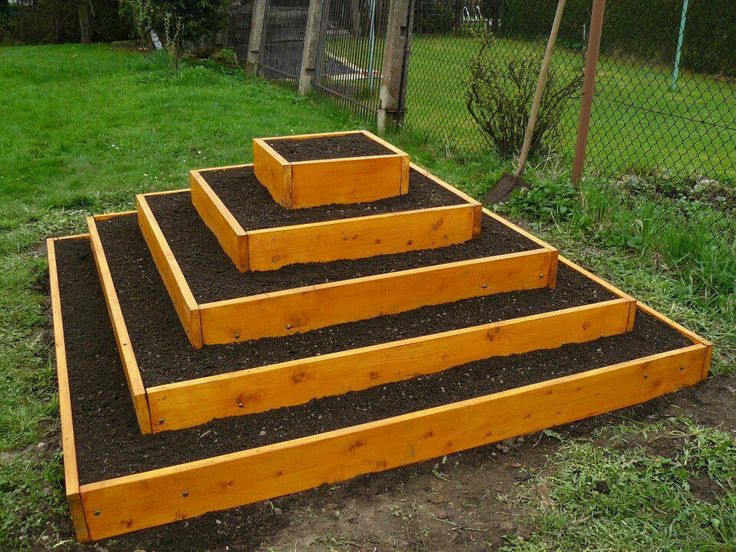
As you can see here, this type of garden bed can be made as large, small, or tall as you need it to be:
Adding Horizontal Supports
Before you add the horizontal supports, move the pyramid raised garden bed into place. If you try to do so after the supports have been added the entire structure will be very heavy, and you’ll need quite a bit of help to move it.
No matter how tall you decide to make your garden bed, measure twice to ensure that each level of horizontal supports is equally spaced. If you finish making your garden bed and the levels are a bit uneven, it will still be perfectly usable — shorter pyramid beds have more room for error than tall ones.
Cut shorter pieces of wood to make the horizontal supports, and complete each section of the tower before moving onto the next. In other words, instead of laying out the horizontal supports in one horizontal layer, complete a vertical section of the tower one at a time. Going this route will help you make sure everything is even.
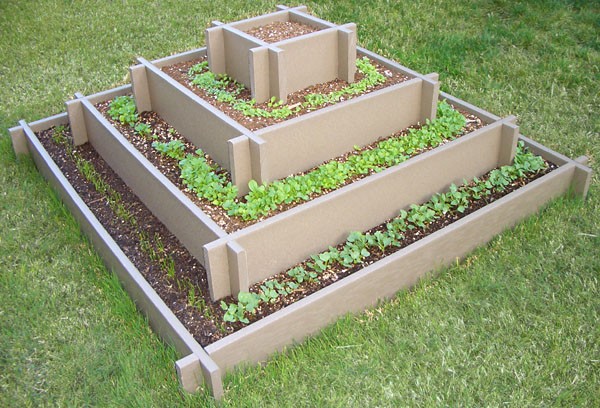
Here’s a similar way to go about adding supports to your own pyramid raised garden bed:
Finishing with Soil
Only after you’ve positioned and finished building the pyramid raised garden bed should you fill it with soil. If you’re using plants, you’ll also want to add them at this time. Strawberries are one of the most popular plants to place in pyramid garden beds because they thrive incredibly well in such a structure. Herbs are also great to add, as they can grow well without you having to bend all the way to the ground to tend to them. No matter what you decide to plant, a major benefit of using this type of raised garden bed is you won’t have to put as much stress on your knees and back, and raised beds also help eliminate the problem of weeding — you’ll either have a drastically reduced number of weeds to pull or none at all.
If you’re starting your garden from seed, you can wait until after the soil has been watered and then place the seeds in each level. Start adding soil from the bottom level, compact and even out the soil, add any plants you’re using, and then move up to the next level. Continue to do this until the entire garden bed is filled, then gently water the soil. If you’re watering with a hose, use a water breaker so the hose doesn’t force soil out of the garden bed.
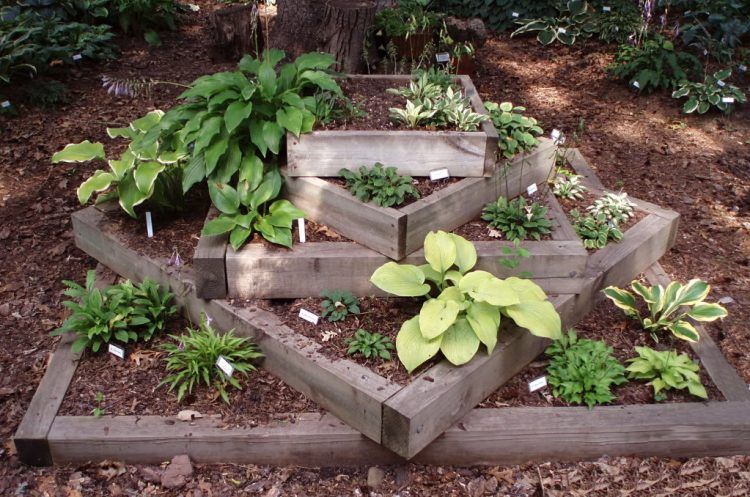
If you’d like some inspiration on how to use or maintain your finished garden bed, check out these ideas:
2 Pings & Trackbacks
Pingback:Raised Garden Bed Guide: 15 Easy Design Ideas & DIY Plans
Pingback:10 DIY Pyramid Planter Plans Free - All Sands