

Plasterboard (also called drywall) is composed of a thin sheet of plaster that is sandwiched between layers of heavy paper. The paper on the front or face side is smooth, and the back or reverse side has a rougher texture. Plasterboard came into wide use following World War II because of high demand for inexpensive home building methods due to a housing shortage. Today, plasterboard is a favorite choice for professionals and do-it-yourselfers alike. It is used to line interior ceilings and walls, and it provides excellent sound insulation.
Assemble Your Tools and Materials
There are just a few basic tools that you need to install plasterboard. Start with an electronic stud finder, a measuring tape, a chalk line and a drywall or utility knife. Other tools you need are a ladder, level and screw gun or hammerer. Purchase enough plasterboard to cover the entire area. Add 20 percent to allow for trimming. Additional materials include drywall screws or nails, fine sandpaper and joint filler compound. If you are installing the plasterboard on a ceiling, you also need carpenter’s glue.
Mark Out the Studs
Use the stud finder to locate the studs in the wall or ceiling. Mark the locations with a pencil. Snap the chalk line to mark the entire length of each stud. Measure the distance from one edge of the wall or ceiling to the first stud. Measure the distance between each stud and write down the measurements.
Position the Plasterboard
If you are installing the plasterboard on a ceiling, spread carpenter’s glue on the back (rough) surface. Position the first sheet along the edge where you are starting and in the corner. You may need someone to hold the sheet in place while you anchor it. Put a drywall screw or nail along the stud every 12 inches. Repeat this step until the entire area is covered. Use the utility or drywall knife to trim sheets as necessary.
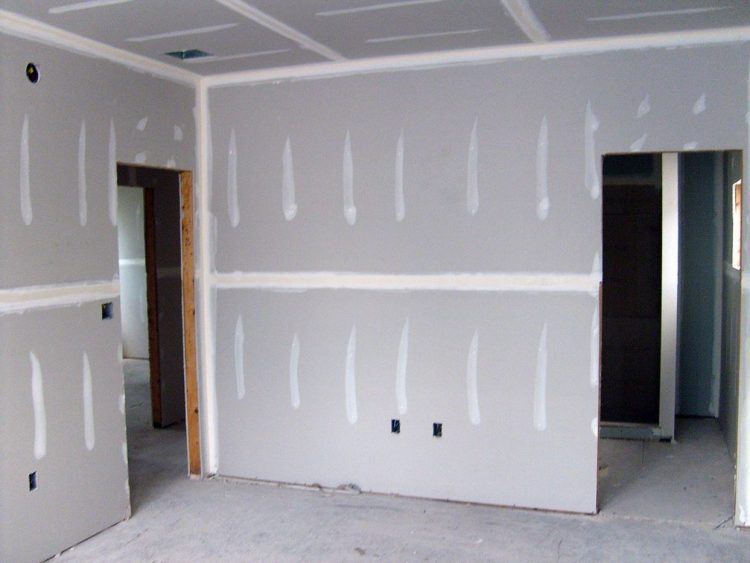
Seal the Joints
Apply joint filler compound along each seam. Use the knife to smooth the compound. Allow the joint filler t dry for five hours and apply a second later. Repeat to add a third layer, and allow it to dry for 24 hours. Lightly sand the surface until it is smooth.
Conclusion
Plasterboard installation is an ideal DIY project for the DIY veteran or beginner. You can use it to improve a room’s appearance and sound insulation. Plasterboard is vulnerable to dampness, so you should not install it in areas like bathrooms or kitchens.
Comments
Loading…