

A great project to try over a weekend is a wine rack made out of an old pallet. The actual construction process takes anywhere from an hour and a half to an afternoon. You start by hunting for the pallet. The easiest way is to drive past local stores, checking in the back of the store for any pallets that look as if they are going to be discarded. Sometimes they will be piled next to the trash bin; or actually inside it.
When hunting for the old pallet you will use to create your wine rack, be sure to check out local hardware stores. Retail shops often have pallet shipments and will usually give away their extra old ones. But do be certain to ask the store manager for permission before taking one. They may still be using theirs.
Materials List
- Reclaimed wood pallet
- Miter saw or Hand saw
- Hand drill
- Jig saw
- Hammer
- Pry bar
- Box of 2 inch Nails
- Hand sander, 120 grit and 220 grit sandpaper
- Pencil
- Box of 3 inch screws, and two 2.5 inch screws for hanging the finished wine rack
- Clamp
- Carpenter’s level
- Yardstick or carpenter’s ruler
- Work table
- Stud finder
Step 1. Take Apart the Pallet
Use the hammer and the pry bar to disassemble the pallet. Remove the boards from the pallet, and take out any old nails using the pry bar. If you have a reciprocating saw or angle grinder with a metal cutoff blade, these will remove the nails easily, but a pry bar will work just fine with a little extra effort.
The pallet should have several 2X4 boards and several 1X4 boards. Place them in separate piles to prepare them for cutting, using the following cut list:
- Cut TWO 2×4 boards to a length of 11 inches.
You will need on for each side of the wine rack.
- Cut ONE 2×4 board to a length of 10 and ¼ inches.
This board will be used in the middle, and it will sit on top of the 1×4 board that the wine bottles will sit on.
- Cut FIVE 1×4 boards to a length of 30 inches.
You will use 3 for the back, 1 for the front and 1 for the wine glass holder.
- Cut ONE 1×4 board to a length of 27 inches.
This will be used to make the horizontal piece which holds the wine bottles.
- Cut TWO 1×4 boards to a length of 3 inches.
These will be used to make spacers on each side underneath the wine bottle support and above the wine glass rack
Step 2. Refine the Cut Boards
Create rounded fronts on the TWO 2×4 boards. Use something round, like a can or large jar lid, to trace the corner of each 2×4 so that you have a line to cut a rounded corner. Use a pencil to trace so that if you make a mistake you can erase and try again. Make sure the round edges match by holding the wood pieces next to each other to compare them. Be certain to clamp each board to the worktable before you saw them, to keep your cuts secure and even. Then, cut the rounded corners using a saw.
Step 3. Assemble the Boards
- Using nails or screws, attach each of the 11 inch 2×4 boards to the sides of the 1×4 27-inch long board. The 27-inch long board will be the base of your wine rack.
- Next, nail the front and back 1×4 boards using nails or screws to drill them into the 2x4s.
Step 4. Add the Spacers
Use the 3 inch, 1×4 boards to make spacers on the lower edge of the wine rack. Put one on each side, aligned with the outside edge. They will create a space for the wine glass bottoms, making it easy to slide the glasses into the space.
Step 5. Make the Wine Glass Slots
Using the board reserved for the wine glass slots, measure with the yardstick so that 6 glasses will fit evenly. The best method for measuring is to start from the outside edge and measure in about 4 inches from each edge. Then, mark three more holes in order, evenly spacing them. This will take some extra measurements to be sure each wine glass slot is evenly spaced from the other. Follow the old carpenter’s rule of “measure twice, cut once” to get the best spacing.
Mark the place where each wine glass will rest on the board. Draw straight lines from the six marks for each resting place to the front edge of the board. Make certain to predrill the holes to avoid splitting the wood. Also, be certain the clamp the wood you will drill to the work table for secure drilling. When you finally drill the holes, make them about 1 and ½ inches deep. When you create the rounded slot back and the slots, the holes will serve as a guide and keep the wood from splitting.
Use a 3/8-inch drill bit to create a rounded slot back, and the use a jigsaw to cut straight lines to create the slots which lead to the resting places. You will have six resting places and six slots.
Step 6. Sand the Wood Boards
Using the hand sander, sand the cut boards lightly with the 120 grit sand paper. Then, use the 220 grit sand paper for a finer finish. You can leave the wood as is, or you can stain or varnish it at this point. Leaving it as is will give a nice rustic look and leave the pallet wood natural. It also saves time and money. The choice is up to you.
Step 7. Final Assembly
Nail or screw the wine glass slot board to the bottom of the rack. Be certain to align the outside edges for a nice fit.
Step 8. Attach the Wine Rack to the Wall
Use a stud finder to figure out where they are located on the wall you want to display the wine rack. Use screws to attach the rack to the wall. You want it to hang securely with the extra weight of the wine bottles and glasses it will hold. Use a level to be certain that the rack is even on the wall.
Step 9. Fill the Wine Rack
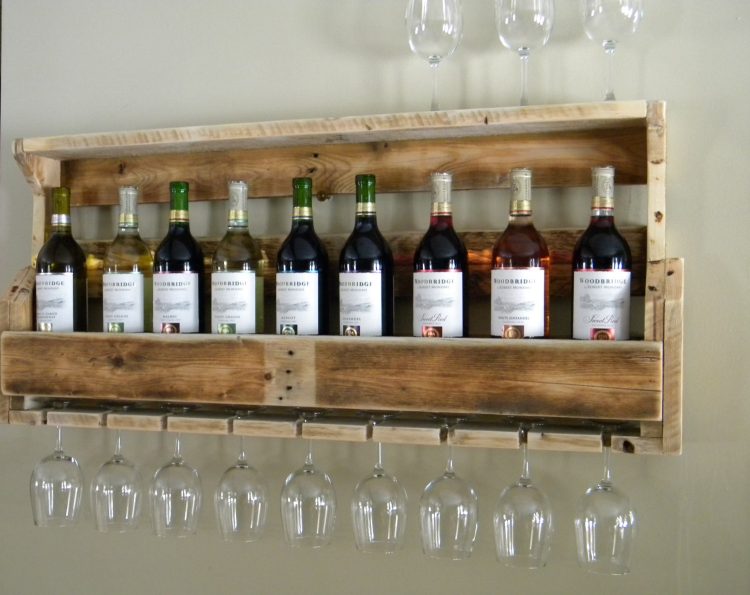
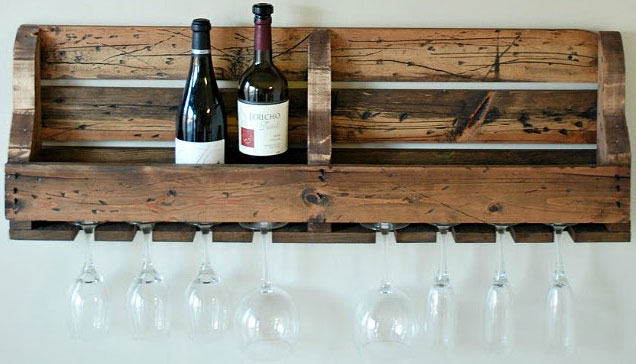
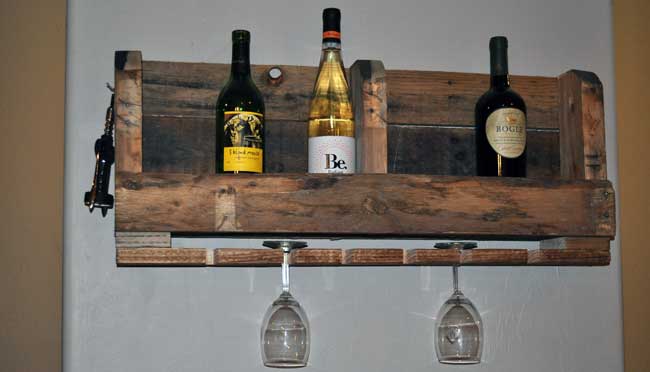
Choose a few of your favorite wines to display in the rack, and hang the six glasses upside down using their stems to slide into the slots you created. Push the glasses all the way to the back of the slot. You can use a set, or you can use different glasses. If you choose different colored glasses, the light will sparkle through the colors, looking very pretty indeed.
This project is a wonderful way to re-purpose wood that would otherwise take up space in a landfill. The wood will have a character all its own. Some woodworkers have made this project several times so that they can give the extras as gifts. It’s a nice, easy going project to fill an afternoon.
Just in case you didn’t get all of that in text, here’s a solid video to help you out
2 Pings & Trackbacks
Pingback:25 Cheap and Easy Rustic DIY Home Decor Ideas to Try - petrolhat.com
Pingback:25 Cheap and Easy Rustic DIY Home Decor Ideas to Try – World Etes