

When it comes to cleaning, replacing or repairing a screen window, it’s surprising how many people are stunned to find out they don’t know where to start. For instance, how do you remove the screen window from the inside when it’s located on the outside? Or, how do you get the screen out without bending it? The good news is, the whole process is much easier than you might think.
No need to worry about bent screens or inaccessibility. Screen window installation and removal is pretty simple, and the following are step-by-step instructions on how to replace your screen windows from the inside. Plus, if you still need a little additional assistance, the video below can help you along.
Step 1: Open the Window
In order to access the screen and be able to remove it, you will need to open the window fully. This may be raising it up as high as it will go, sliding as far to the side as it will go, or adjusting the latches on windows that drop down for cleaning. Regardless of type of window, it needs to be open all the way in order to get the screen out without damaging the frame.
Step 2: Locate tabs or pins
Every screen window has a set of tabs – either square or rectangular – which protrude out from the mesh of the screen. Alternatively, the screen may have a set of spring pins in the frame itself, which insert the pin into a small hole to keep it secure. Either way, they will be located at the bottom or at the sides. These tabs or pins are what will allow you to release the window screen from where it sits in the frame.
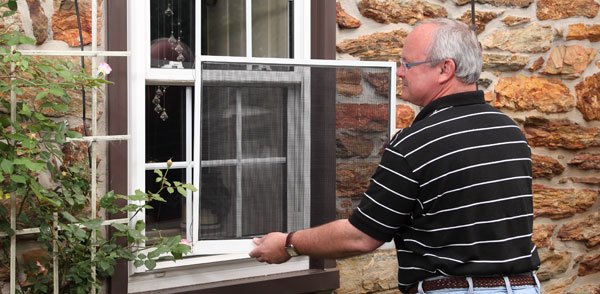
Step 3: Lift the screen
At the top or side of the window screen, opposite of wherever the tabs or pins are, there will be some compression clips that will flex and compress down when you pull up on the tabs. Pulling up on the tabs puts pressure on the clips, and you will need to pull up on the tabs or pins to lift the screen window enough to allow it to clear the screen slot on the window frame.
Note: if the tabs are on the side, you will not pull up. Instead, you will pull the tabs toward the opposite side where the clips are located.
Step 4: Slide/drop the screen window out
.While still holding onto the tabs or pins, you will want let the screen drop down slightly. Then, depending on the shape or type of window, you will slide the screen out, or in, at an angle and then maneuver the screen so it ends up inside the home. Most of the time, you will let the screen drop toward the outside, and then pull it in at an angle, so don’t let go of the tabs until you have one of your hands on another part of the screen frame.
Step 5: Clean, Repair, or Replace
Once the window screen is out, you can do whatever you need to before putting it back it. Whether you are cleaning the screen, putting in a brand new screen, or simply repairing the one you already have, the process is the same.
Step 6: Re-Install the Screen Window
The same process will be used to re-install the window screen as when you removed it, only in reverse order.
- Get the screen in position. This is accomplished by getting the screen situated outside the window while grasping the base so as to keep it secure (don’t drop it!). You will then slide the top (or side) of the screen which houses the compression clips back into the screen slot in the window frame.
- Slide the screen all the way back in. Once the screen is lined up in the correct place where the compression clips are, you will need to carefully transfer your hands to the tabs or pins. Using them to hold the screen in place, slide the screen back in where it belongs, putting light pressure on the compression clips to keep them flexed and allow for maneuverability.
- Release tabs. Once the window screen is back in the proper location, you can release the tabs or spring pins to let the screen fall naturally in its place. Don’t forget, though, if you have spring pins for your window screen, then you will need to make sure they are released into their designated holes, or the screen will not be secure.
Removing and replacing window screens from the inside is a very easy process, but if you’ve never done it before, it can seem a little intimidating. Once you’ve done it, you’ll probably wonder what all the fuss was about. Until then, however, follow the instructions and check out the video. It’s much easier than you think.
3 Pings & Trackbacks
Pingback:How To Install Locking Clip For Car Seat? – CarDetail
Pingback:How To Install Locking Clip For Car Seat? – TopCar
Pingback:Best 17 how to install a window screen with tabs – hkfindall.com