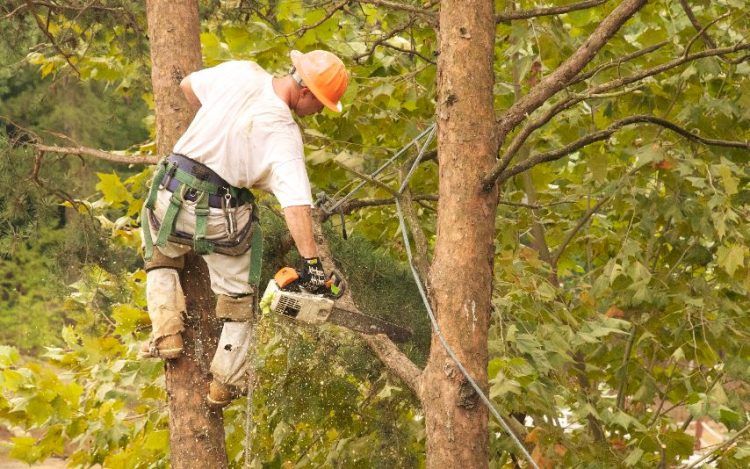
There’s more than one reason you, as a home or land owner, may make the choice to trim a tree or two on your property. The most obvious reason is that the limbs are beginning to enshroud a power line or gloom over the roof of your house. Another reason to trim back limbs and branches is if the brush is growing too quickly and crowding a view from a window. Irregardless of the reasoning, trees need to be properly pruned annually to keep them green and thriving for years to come. Neglecting annual trimming can lead to not only less aesthetically-pleasing and tidy looking trees, but may also cause wild branches to grow in dangerous directions, which could lead to a necessary removal later down the road. Trimming requires some basic know-how before getting started, such as:
- tree breeds and seasons
- trimming technique
- treating young and old trees
- tools needed and their use
Trimming Seasons
Different trees require different times of attention and “rules”. These rules vary slightly depending on the breed of tree, but truly just being aware of the importance to annually trim is key to getting started. A simple rule of thumb is that shade trees (oak, willows, sycamores) are best pruned during the fall and winter, while blossoming trees (crape myrtles, magnolias, cherry) are best pruned during the spring.
Trimming Techniques
Properly trimming should take the height of the tree into account. Trees that appear stocky with heavy-set crowns are in need of trimming. Envision two-thirds of the tree’s upper half as being the majority of branches. When clipping or sawing off branches, always cut above a fresh, budding limb. Cutting anything too short can stub the trees growth and may even lead to its eventual decay. It’s also important to try your best to cut at an appropriate angle – a nice, slight slant is perfect and promotes future growth. When cutting an unwanted limb off a central branch, do not cut the limb off flush with the branch, leave a nub so as to not deaden the tree. The angle you cut at will also determine the direction a limb will grow. Another important tactic, is to begin with large, unwanted branches, this will create an easier pruning job for you by eliminating any thick branches that may be blocking your view to smaller dead twigs and limbs. Always keep the protection of the tree’s trunk and bark in mind while cutting away dead wood or unwanted limbs, harming any interior of the tree trunk can cause severe damage.
Accounting for Tree Age
Whether your tree or trees are young or old in their growth, they should be trimmed. Young trees are particularly important to begin trimming as it acts as a form of training for the sapling, molding it to grow in a desired shape. As the young plant grows, it will require less maintenance, keep its trunk nice and strong, and ensure a longer life. Middle-aged trees, between three to seven years old, require the most attention. Be sure to ride of any seedlings at the base of your tree as they will deteriorate the strength of the tree’s roots and cause long-term damage to its structural integrity. Mature tress, ten years or older, require little trimming if they’ve been annually pruned their whole lives – simply search for dead or weak limbs and clip them off.
Equipment
Loppers, pole pruners, ladder, and pruning saws are four of the staple accessories for anyone looking to trip back bushes or trees. Loppers are long-handled clippers that can grasp decently-thick brunches and snip them off relatively easily. If you experience issues with a lopper, upgrade to a pruning saw which can more easily detach thicker branches. Pole pruners are for those hard-to-reach branches – they come with a pulley system and saw head, which allows you to place the mechanism at your intended incision place and pull the handle, or choose the serrated edge of the saw to cut through the undesired branch. If you are still unable to reach a particular set of branches or limps, grab a ladder and a friend so that they may secure the ladder safely below you as you etch away and get your tree looking trim and shapely. Remember to store your tools in dry areas to protect them against damaging rust, and keep their blades sharpened to give your tool’s life longevity and also make your job easier.
Step-By-Step Guide
Step 1: View the tree from a distance and establish a plan for your desired outcome. Ask yourself these questions: Is my tree leaning? Is my tree too stocky? Is there possibility of my tree growing too closely to my house? A neighbor’s house? Or a power line?
Step 2: Utilize the pruning saw and/or pull lopper to eliminate any large unwanted branches. Be sure to wear safety goggles during this task as any debris or dust could land in your eyes.
Step 3: Prune with intention. Any low-hanging limbs that aren’t adding stability to the tree’s base can go. Practice cutting at the proper angle.
Step 4: Bind your branches and limbs up with line to ensure they aren’t scattered during an unexpected storm. Make arrangements for a local extraction company can properly remove the unwanted wood or choose to store in a dry place for kindling and firewood for current or next winter season.
Click here for an additional guide and technique advice from Plan It DIY.
Have a bigger job ahead of you?


Comments
Loading…