

Remember when you were a little kid and you used to dig up sand at the park? You used to use one of those little toy bulldozers and you simply had a ball just picking up and dumping sand. Nowadays that’s just not as stimulating as some of the amazing things that are possible for kids. And you can do it in your own backyard no less. Gone are the days of the simple backyard swing sets and treehouses; with a little creativity and know-how, you can turn your backyard into a fun and unique experience for your kids. From simple to spectacular, these DIY backyard projects are guaranteed to delight your children (and probably you!)
Sand Pit
On the list of things kids love to do, digging is way up there. Ditch the cheesy store-bought plastic sand box and create your own giant sand pit. The idea starts simple enough: using lumber suitable for ground contact, build a square box about a foot high- no floor needed. The box can be as large as you would like but keep in mind, you will be filling it with sand! You can leave the box plain, stain it, or paint it, the design options are up to you. Then, using landscaping fabric, line the bottom and sides of the box, making sure it is secure to keep water out and sand in. Next, install hooks around the outside edge of the box, about two inches from the top. Using water proof fabric from either the craft or hardware store, fashion a cover for your sand pit which can be secured using ties or grommets. Adding ledges to the side to sit on or poles to hang a fabric canopy from are just some ideas for optional ad-ons. Once complete, fill with sand (or even dirt) and watch the kids have a blast.
Tight Rope

Start your children early on their circus training and install a tight rope in your backyard. This is fun at its simplest, all you need are two sturdy trees and rope. Wrap a rope around a tree in your backyard a few times and secure with some good knots. Next, run the rope to another tree in your yard and, pulling taut, secure the same way as the opposite side. Then, run a second line, in the exact same way, about 3 feet above the first in order to provide the traverser with something to hold onto. For younger children, keep the bottom rope close to the ground and the second rope within easy reach. Increase the height for older children to keep the thrill alive. Of course, if you don’t have suitable trees in your backyard, you can install metal poles into the ground, using concrete footers the same way you would a fence post. A word of caution is in order here; make certain the ground along the path of your rope is clear of rocks or other objects that could cause injury and remember to watch out when mowing the lawn!
Climbing Tower

Anyone who has spent any amount of time around children can attest to the fact that they love climbing, so provide them with an outlet for their obsession with a climbing tower. This tower does take some carpentry know-how and tools, but is well worth the effort. Using lumber suitable for ground contact, construct a free-standing pyramid frame of equal-sized sides; the dimensions are up to you depending on space and age of children. Each side will have a different climbing element so here is where you can really customize it. For a simple idea, take thick, sturdy rope, with knots tied about a foot apart, and string from the top of the pyramid to the bottom. Carrying on the rope theme, pre-formed rope net can easily be strung across one side of the pyramid as well. You can also sand and paint, or stain, flat pieces of lumber and run them horizontally up one side of the pyramid, making certain to leave enough space between each to provide space for hands and feet. Lastly, no climbing pyramid would be complete without a rock wall. Completely finish one side with wood and then attach “rock” hand and foot holds, which can easily be purchased online or at retailers selling swing set equipment.
Outdoor Chalkboard
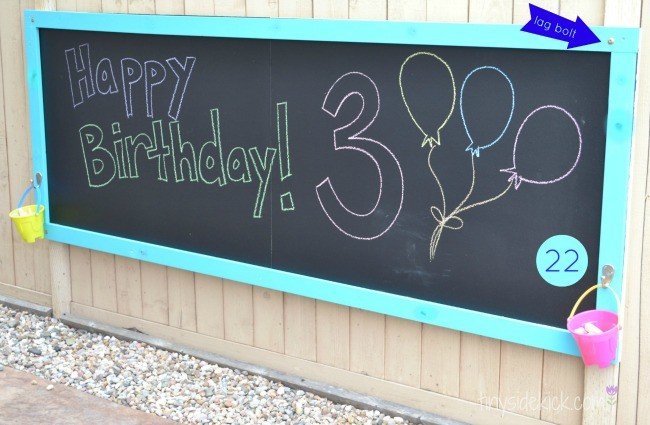
Parents will no doubt fondly remember hunching over the hot asphalt of their driveway as they created chalk masterpieces. Save your child’s back and knees with a giant, outdoor chalkboard. You can attach it to a fence, existing swing set or even have it freestanding; location and size are up to you. Build two wood frames of the desired size, one for the front and one for the back. While both frames should be primed with two coats of outdoor primer, you may also wish to paint the front frame for added flair. Next, cut HardieBacker to the size of your frame and apply primer as well. Now comes the chalkboard surface and while you can buy outdoor chalkboard paint, it is costly and difficult to find. Instead make your own; using black or dark green outdoor paint, mixed with non-sanded grout for texture, you have a durable and affordable surface. Once everything is dry attach the back frame to the HardieBacker using construction adhesive and screws and then the front frame using adhesive and screws, driven through the back to hide them. Hang on your desired location and enjoy the chalk masterpieces sure to follow.
Plant TeePee

Even if you can’t build a treehouse, you can still provide a hideaway for your child; best of all, this plant teepee is edible! Start by building the frame of your teepee, using lightweight rods such as bamboo sticks, PVC pipes or hollow aluminum tubes. There are countless things you can use, just make certain they are not too heavy in case they fall. Depending on how large you want the teepee will determine how many poles and of what length you will need so do some brainstorming. Once you have your poles cut to length, choose a spot in your yard with ample sunlight and good soil. Then place the poles into the ground in a circle, leaving a gap to serve as an entrance. Next, wrap rope around the top where the poles meet and tie securely. To create a canopy, plant a seed on either side of each pole. Depending on your location and preference, choose a plant that “runs” such as pole beans, runner beans, flowering vines or vine fruits like grapes or blackberries. In order to ensure success, read up on tips to plant and cultivate your seeds. The best part of this teepee is you can eat it (depending on what you plant) and once the plants die, you can always convert it to an “old sheet teepee”.
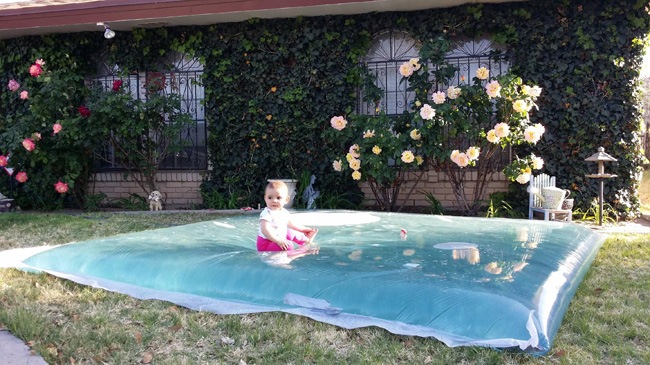
Water Blob
The idea of a kid jumping on a water-bed strikes terror into any parent, but what if that water-bed was super-sized and outside? Then you have a recipe for ecstatic fun; meet the simple, yet awesome, water blob. Using painter’s plastic, an iron, parchment paper and duct tape, it is easy to create this giant, watery pillow. Take a roll of painter’s plastic or plastic sheeting (about 4 mil thick) and cut to desired size. Sandwich the edges of the plastic between two sheets of parchment paper and using your iron on its hottest setting, firmly iron the edges of the plastic together. Completely iron shut all of the sides except for one tiny section and head outside! Insert your hose a few feet into the plastic at the opening and prop up. Allow the blob to fill completely with water before withdrawing the hose and sealing the opening with duct tape. Place in a flat, clear surface in the yard and let the kids loose for some bouncy, slippery fun. The best part is the blob can be drained, moved (to allow the grass to recover) and reused.
Stepping Stone Trail
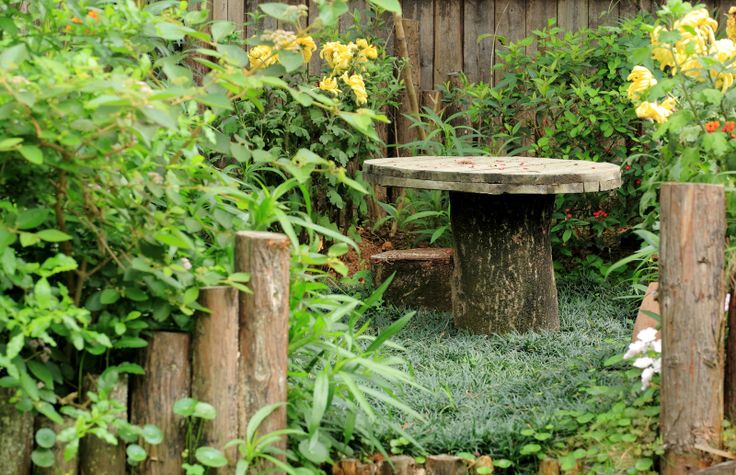
This is one incredibly easy project that kids will absolutely love. Create a trail throughout your backyard for kids to hop and jump along. There are a variety of objects that can be used as long as they are large enough for little feet to securely land on and leveled properly to avoid wobbling. Old tree stumps, cut to different heights are perfect, as are large, irregular shaped patio stones or sturdy logs. Wind the trail throughout your yard and watch as your children create grand adventures.
Reclaimed See-Saw
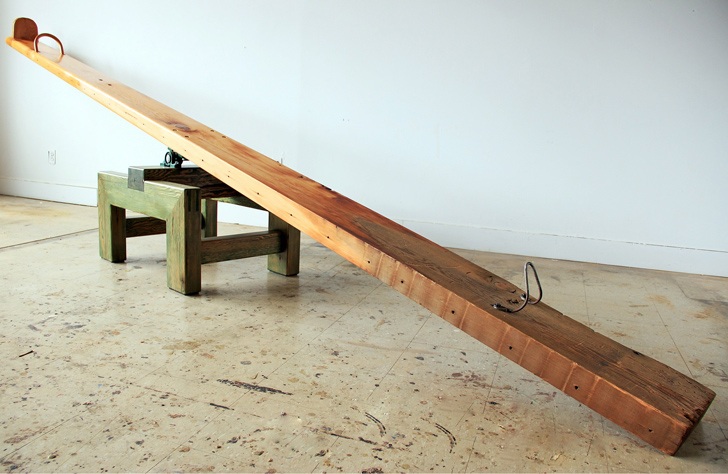
It seemed there was a time when every playground had a see-saw, but now they seem to have faded into obscurity. Small, plastic ones are still available at toys stores, but they fail to satisfy older children. Repurpose an old tire into a nostalgic toy your kids will love. Larger tires, such as from trucks or tractors work best for this project, but any tire will work, simply cut in half with a hacksaw. Next you will create the seat of the seesaw and this can be a simple piece of sanded and painted wood or you can add handlebars, seat backs or other options. Once completed, you will center, and then secure, the seat to your tire. Find a nice spot in the yard and let the kids teeter away.
Outdoor Twister Board
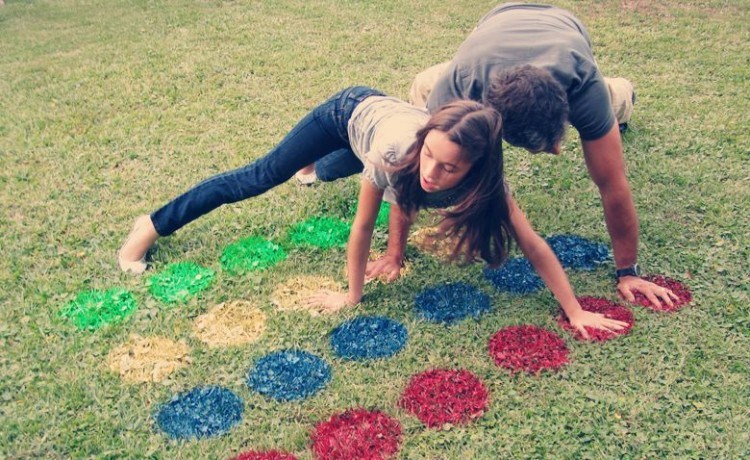
Anyone who has fond memories of playing twister, that plastic sheet bunching and sliding all over the floor, will love this simple, outdoor Twister board. 4 cans of spray paint, cardboard, scissors and a pencil are all that is needed. Make a stencil by tracing a large circle, like a plate, onto a piece of cardboard and cutting out the circle. Then, using the same plate, place about an inch of your plate onto the cardboard where you think your next circle will go (this will ensure that each circle is evenly spaced), trace and cut out the half-moon shape. Now the fun begins so grab your spray paint and head outside. Using your template as a stencil, paint a row of each color, red, blue, yellow, green, with 6 circles of each color. Voila, there you have your outdoor Twister board. If you are in the unfortunate position of not having a spinner, head to your hardware store and pick up 4 paint sample squares in each of the colors. Each set of colors will be labeled with Right Foot, Right Hand, Left Foot or Left Hand so you have a complete set. As you play the game, a square is picked, put back into the bowel, and shuffled around.
PVC Fountain/Fort
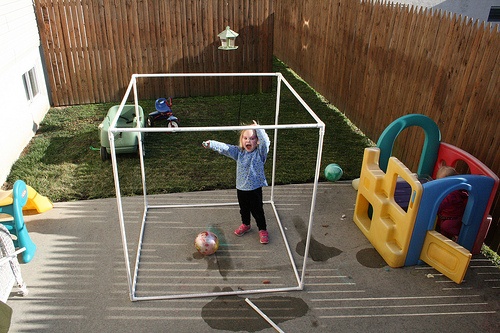
Sprinklers have been delighting children for decades, and with this DIY PVC fountain, you can take the fun to the next level. The best part is with a little imagination, you can design this to be as elaborate or simple as you would like. As an added bonus, older children can join in on the designing and building. You begin by designing the layout of your fountain and selecting the PVC pipes, tees and elbows needed to build it. Using a hacksaw, cut the pipes to size and drill holes for the water. Next, assemble according to your design using PVC adhesive for added stability. Once assembled, attach the hose, turn on the water and watch the ensuing fun. For extra fun, you can add misters, hanging foam toys and other fun additions. Once the weather turns cool, don’t consign this to the garage; throw some tarps or old sheets over it and you’ve created an easy fort.
These projects, ranging from simple to complex, economical to expensive, all have one thing in common; they are sure to bring squeals of delight to your kids. But the summer is only so long, so it’s time to get started.
Comments
Loading…